Orders over $75 ship free in the United States (lower 48).

What Are High Speed 3D Printing Materials?
One of the questions we get asked frequently is, "When are you going to have a high speed filament for the Bambu Lab printers?" Can 3D-Fuel filaments work well in today's high-speed 3D printer systems?
The reality is that many of our existing materials already are "high speed filaments".
While it may be true that we have/had speed recommendations of 40 - 100 mm/s for our Standard and Pro PLA+ materials, those recommendations were from a time in the 3D printing industry where 100 mm/s was exceptionally fast.
Now, with printers like the Bambu Lab able to print at up to 500 mm/s, we need to re-evaluate what our materials can do.
So, we took 3 of our most popular materials and put them to the test to see what their volumetric max material output can be at different temperatures. The different temperature bands are important, because with greater speed comes challenges. With material moving through the printer hotend, there is less time available for it to achieve a complete melt of the filament. This can be countered, in part, by raising the print temperature.
Another consideration is layer-to-layer bonding. With such fast print speeds, there is less time spent with the new layer being heated to bond to the previous layer. In situations where the material has been able to be physically pushed through the hotend, the layer bonding may be weak.
Yet another thing to keep in mind is the printed part's surface finish. The general rule with materials like PLA, PETG, and PCTG is that the hotter you print, the glossier your printed parts will be. And/or, the slower you print, the glossier your printed parts will be.
If you've ever 3D printed a model and been confused by some layers being glossy while others appear to have a more matte finish, I can almost guarantee that the matte layers were printing faster than the glossier layers. This could be due to a minimum layer time being enforced on a smaller section of the print. Smaller area means that the printer is being forced to slow down to ensure that the previous layer has adequate time to cool sufficiently before the next layer is printed.
Now, onto our testing process for these prints. MakerWorld user tsubus did an excellent job of preparing a model and test method for determining the max flow of a material.
In essence, each layer prints faster and faster and when the layer quality deteriorates, you can determine that's where the volumetric max output is.
Due to how he set the profile up, the tower increases perimeter print speed by 14mms every 1mm of z height causing an increase of 1mm3 of flow starting from 11mm3 for the first 1mm.
What this means is that you slice and print to model and stop the print when you see it starting to underextrude or have inconsistencies in the layers.
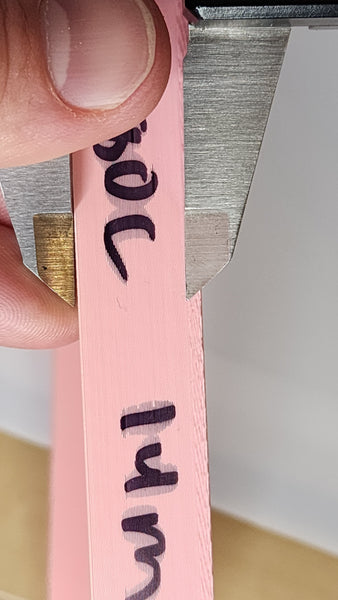
Measure from the bottom to where the last layer that looks perfect. The measurement in mm + 10 is what your max volumetric flow is.
For my test example of 3D-Fuel Tough Pro PLA+ @240c is 13mm + 10 = 23 mm^3 max flow. We'll set it slightly lower by about 10% for safety, so a maximum volumetric output of 21 mm^3.
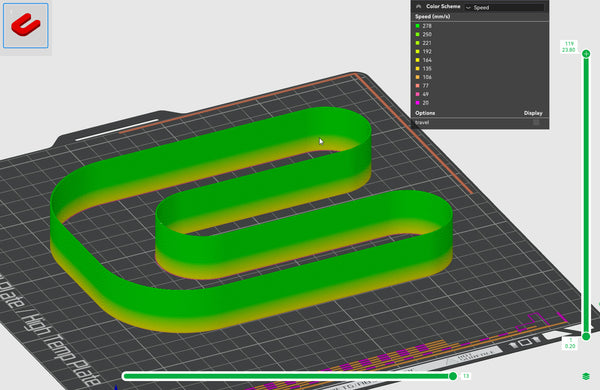
This equates to a print speed of approximately 278mm/s @240C, quite a bit higher than the previously stated 100mm/s that we had on our packaging.
We guaranteed 3D-Fuel Tough Pro PLA+ to 100mm/s, but tests show it consistently capable to 278mm/s and faster.
If we increase the print temperature, we can get even greater speed. For example, at 280C, our test print starts to fail after 16mm. So that is a max of 26 mm^3 output. If we subtract 10% for safety, we have 23 mm^3. Entering that into our filament setting, we are able to achieve a print speed of approximately 305 mm/s.
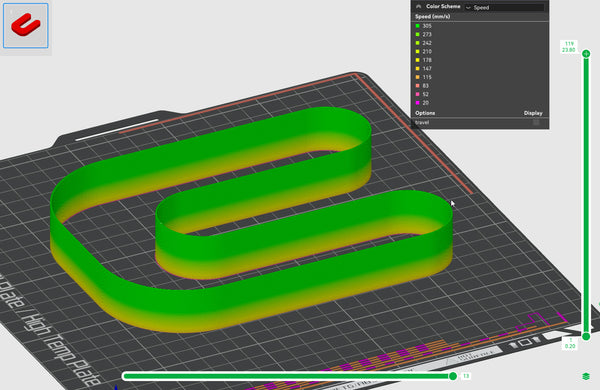
Now, it must be noted that we disabled the "Slow printing down for better layer cooling" option in the Cooling settings. Otherwise, it would have artificially slowed the print down to make sure that each layer took at least 12 seconds to allow the previous layer to cool sufficiently. This is not a realistic thing to do since we don't want our part quality to suffer simply due to pushing speed to the max.
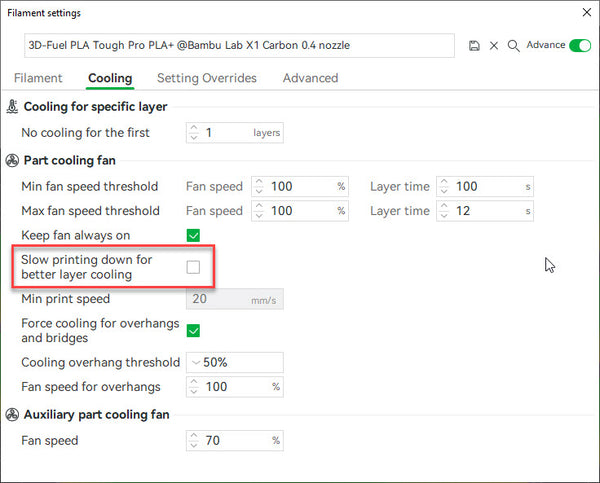
However, if you are printing a large part or a build plate full of smaller parts, it's certainly possible that even with the minimum layer time of 12 seconds, your printer could be hitting the max speed limited only by the volumetric output of your filament.
Now, let's take a look at the three materials that we said we were going to test and see how they compare at different print temps.
Standard PLA+
Our Standard PLA+ is the building block of 3D printing projects. Low cost, basic performance, and available in 40 colors.
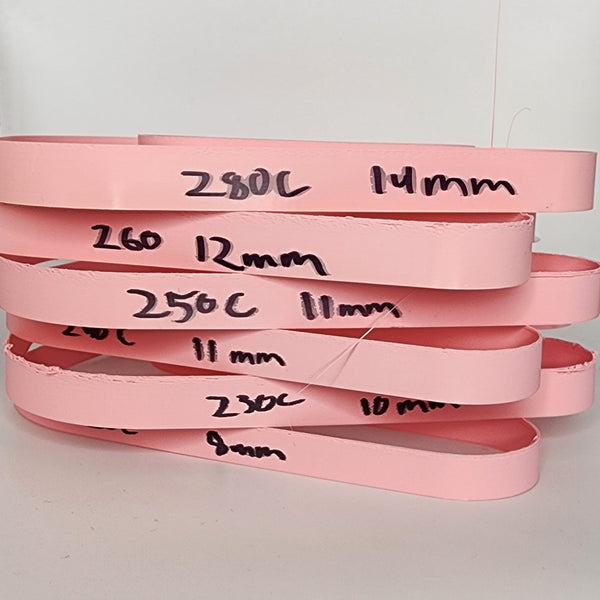
| Temp | Height | + 10mm | 10% Safety Margin | Max Speed @0.2mm Layer |
| 220C | 8mm | 18mm | 16 mm^3 | 212 mm/s |
| 230C | 10mm | 20mm | 18 mm^3 | 239 mm/s |
| 240C | 11mm | 21mm | 19 mm^3 | 252 mm/s |
| 250C | 11mm | 21mm | 19 mm^3 | 252 mm/s |
| 260C | 12mm | 22mm | 20 mm^3 | 265 mm/s |
| 270C | 13mm | 23mm | 21 mm^3 | 278 mm/s |
| 280C | 14mm | 24mm | 22 mm^3 | 292 mm/s |
Tough Pro PLA+
Our flagship PLA material, Tough Pro PLA+ is what it says: an extremely tough PLA material. It has excellent layer-to-layer bonding and has better temperature resistance than Standard PLA+ and can also be annealed for even greater temperature performance.
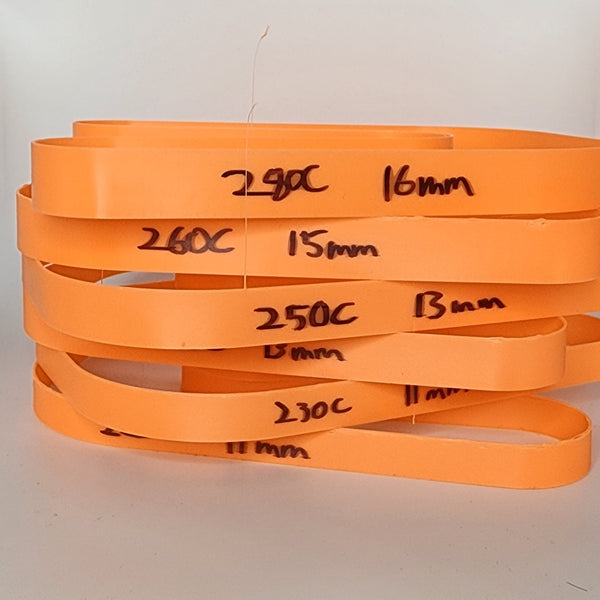
| Temp | Height | + 10mm | 10% Safety Margin | Max Speed @0.2mm Layer |
| 220C | 11mm | 21mm | 19 mm^3 | 252 mm/s |
| 230C | 11mm | 21mm | 19 mm^3 | 252 mm/s |
| 240C | 13mm | 23mm | 21 mm^3 | 278 mm/s |
| 250C | 13mm | 23mm | 21 mm^3 | 278 mm/s |
| 260C | 15mm | 25mm | 22 mm^3 | 292 mm/s |
| 270C | 15mm | 25mm | 22 mm^3 | 292 mm/s |
| 280C | 16mm | 26mm | 23 mm^3 | 305 mm/s |
Pro PCTG
Think about the best PETG you've ever printed with and then put that on steroids. Pro PCTG has better impact toughness and chemical resistance than PETG and is also has the fastest possible printing speeds of the three materials evaluated today.
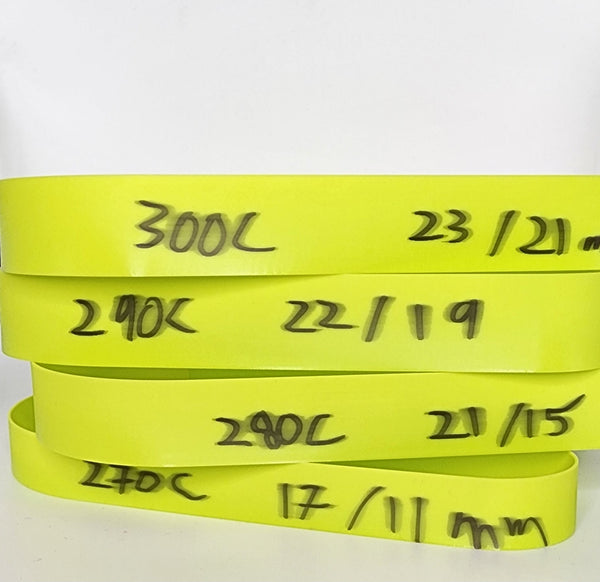
With Pro PCTG we also checked where layers would delaminate when bent. So the height measurement is not just where things visually looked ok, but from where the part strength started to diminish.
| Temp | Height | + 10mm | 10% Safety Margin | Max Speed @0.2mm Layer |
| 270C | 11mm | 21mm | 19 mm^3 | 252 mm/s |
| 280C | 15mm | 25mm | 22 mm^3 | 292 mm/s |
| 290C | 19mm | 29mm | 26 mm^3 | 345 mm/s |
| 300C | 21mm | 31mm | 28 mm^3 | 371 mm/s |
In conclusion, what can we take away from this? High speed filaments from 3D-Fuel are here! Some are faster than others, and speed has its tradeoffs. In our print profiles, we have recommended starting points for good general success, but, as always, you may find it beneficial to do some tweaks to those profiles to best suit your specific hardware and 3D printing projects.
Keep in mind that these are theoretical max speeds on a Bambu Lab X1C. Similar to throwing a vehicle on a dynamometer, it's unlikely that you'll be pushing your print speeds to the physical limit of the filament. But it's good to know that the capability is there!
If you think we missed something or could do something better, please reach out and let us know! We want to help you to be as successful in your 3D printing projects as possible.

Leave a comment